Saturday 7 May 2016

How to Change the Logon Screen Background in Windows 7

Leave a Comment


How would you like to change the logon screen background in Windows 7 to give your Windows a customized look and feel? With a small tweak, it is possible to change the Windows 7 logon screen and set your own picture/wallpaper as the background.
Customizing the login screen background in Windows 7 is as simple as changing your desktop wallpaper. Well, here is a step-by-step instruction to change the logon screen background:
  1. The image you need to set as the login screen background should be a .jpgfile and its size should not exceed 245KB.
  2. The image resolution can be anything of your choice. However, I prefer 1440 x 900 or 1024 x 768. You can use any of the photo editing software such as Photoshop to compress and set the resolution for your image. Once you’re done, save this image as backgroundDefault.jpg.
  3. You will need to copy this image to the following location:
    C:\Windows\system32\oobe\info\backgrounds
    You will need to create that path if it does not already exist on your computer.
  4. Now, open the Registry Editor (Start -> Run -> Type regedit) and navigate to the following key:
    HKLM\Software\Microsoft\Windows\CurrentVersio\Authentication\LogonUI\Background
    If the key Background does not exist, then right-click on LogonUI, select new -> Key, and then name it as Background.
    Now locate OEMBackground (listed on the right side). If it does not exist, right-click Background and select New -> DWORD and name item background.
  5. Double-click on OEMBackground and set the Value Data to 1.
  6. Now log-off to see the new login screen background. If you would like to revert back to the default background, just set the Value Data back to 0.

Using a Tool to Change the Logon Screen Background:

The above steps will give you detailed instructions on how to change the logon screen background manually. However, there is a nice tool to completely automate the above steps so that you can do everything with just a few mouse clicks!
The tool is called Windows 7 Logon Background Changer from Julien-Manici.com. This small tool is very easy to use and contains a set of preloaded images to choose from or you can set your own desired image as the logon screen background.
I hope you love this post! Pass your comments. Cheers :)
Read More

How to Change Your IP Address

Leave a Comment


Every time you connect to the Internet, your ISP (Internet Service Provider) assigns an IP address to your computer that makes it possible for websites and applications to keep track of your online activities and also pin point your physical location. Therefore, to protect your Internet privacy, it is often necessary to change your IP address.

Ways to Change IP Address

The following are some of the possible ways to change the IP address of your computer:

1. Using a VPN: Best Way to Change IP Address

Even though there are several methods to change your IP address, using a VPN proxy is by far the best and most secure way. The following are some of the most popular VPN proxies that most Internet users prefer:

  • Hide My Ass VPN – Hide My Ass is one of the most popular and trusted VPN services that provide a fast and secure proxy server to allow people to easily change their IP addresses and also obtain an IP address from any country of their choice.
  • VyprVPN – VyprVPN offers the world’s fastest VPN services to make it possible for its clients to easily change their real IP using a proxy and support a wide range of operating systems.

Advantages of using VPN over other methods:

  • Fast, secure and highly reliable. All your web traffic is encrypted to keep your data safe from hackers and also protect your privacy.
  • You can choose from a list of countries and locations to obtain a new IP address. This makes it possible to have your origin from any country of your choice.
  • Easily bypass regional blocks to access sites and content that are restricted for your location.

2.Change IP by Restarting the Router

Every time you connect to the Internet your ISP may assign a different IP to your computer called dynamic IP. If your Internet connection uses a dynamic IP you can easily change it just by restarting your network device such as modem/router. All you need to do is just turn off its switch for a few seconds and turn it on again to get a different IP address assigned.
Unlike using a VPN, this method has quite a few drawbacks. Your newly assigned IP will have the same location or country as before and therefore if you’re trying to bypass a country block it would not be possible. Moreover, if your Internet connection uses a static IP address, you will get the same IP assigned no matter how many times you restart your router.

3. Using Free Web Proxy to Change Your IP Address

If you cannot afford a VPN service or restarting the router doesn’t get you a new IP, you can try some of the free browser-based proxy services that help you change your IP address and surf anonymously. The following are some of the websites that offer free proxy services:

Drawbacks of using free web proxies

Even though these services come free of cost they also come with some of the following drawbacks:
  • Most of them are slow and websites take a lot of time to load.
  • Security and privacy are questionable as most of these free services are unreliable.
  • Users have to bare with annoying ads and pop-ups as these sites need to generate revenue to compensate for free service.
  • Limited or no choice over the selection of your IP location.

How to Ensure that Your IP is Changed?


To know your current IP address just type what is my IP address on Google and your public IP address should be displayed in the search results. Once you’ve successfully implemented one of the above-mentioned IP changing methods, you can re-check your IP on Google to make sure that you have got a new one.
Read More

How to Spoof MAC Address on Android Phones

Leave a Comment


A Media Access Control address (MAC address) is a 12-character unique identifier assigned to a specific piece of hardware such as the network adapter of your WiFi device. In simple words, a MAC address can be used to uniquely identify your Android phone on the Internet or the local network.

Spoofing MAC Address on Android Devices

Even though the MAC address is embedded on the hardware device during manufacture, it can still be spoofed to input a new one of your choice. Here is a detailed instruction on how to spoof MAC address on your Android phone.
Before you spoof the MAC address, you need to record the original/current MAC address of your device which can be done according to the instruction below:
  • On the Home Screen of your phone, tap the Menu button and go to Settings.
  • Tap About Device and go to Status
  • Now scroll down to record the 12-digit code shown under the Wi-Fi Mac address. An address would read something like:
    Example MAC address: E5:12:D8:E5:69:97

Requirements for Spoofing the MAC Address

  1. Rooted Android Phone
  2. BusyBox app installed on your phone
  3. Once BusyBox is installed, you need to install the Terminal app
Once the above requirements are satisfied, follow the instructions below to spoof your MAC address:
  1. Open the Terminal app and type the commands as listed below:
    $ su [HIT ENTER]

    $ busybox link show eth0 [HIT ENTER]

    (This will show your current MAC address, just for your confirmation)
  2. Now, type the following command:
    $ busybox ifconfig eth0 hw ether XX:XX:XX:XX:XX:XX [HIT ENTER]

    (In the above command, replace XX:XX:XX:XX:XX: XX with your new MAC address)
  3. You have now spoofed your MAC address successfully. To check for the change enter the following command again:
    $ busybox link show eth0 [HIT ENTER]

    (Now you should see your new MAC address)
I hope you like this post. For feedback and queries, pass your comments

Read More

Sunday 1 May 2016

SHUT DOWN ANY PC ON YOUR LAN USING COMMAND PROMPT

Leave a Comment

This trick will shutdown a selected pc from Your LAN network. You can apply this trick to your office or school. but I take no responsibilities for any action. It's just for fun. Here is how to use this trick :

1. Go to Start > Run and type in cmd

2. You will see the command prompt window. Now type in this command line.

shutdown.exe -i

And hit Enter. You will see the remote shutdown Window. If you know someone’s IP on a computer in your Local Area network, type in their IP Address after clicking the add button.

3. After entering the IP Address click OK. Now watch the person’s face as their computer shuts down.

Some friends have asked me that they got Access Denied error for the remote shutdown. Add the user with the privilege to force a remote shutdown on the computer you are about to Shutdown. To do this go to control panel > Administrative Tools > Local Security Settings. Now go to Security Settings > Local Policies > User Rights Assignment. Double-click on Force shutdown from a remote system in the right pane and click on Add User or Group. Add the computer that runs the remote shutdown command.


Or you can do this go the computer you are about to Shutdown
a) Go to Start > Run > type in Regedit in the dialog box and hit enter
b) Go to My Computer/HKEY_LOCAL_MACHINE /system/current control set/control/lsa
c) Find “force guest” in the right pane Double click on it to modify This entry change the value from “1″ entry to “0″


Read More

Friday 15 April 2016

HACK WHATSAPP GROUP ADMIN [be the admin of Whatsapp group]

2 comments

Finally, this trick is only posted in this blog. and I have tried this trick for hack WhatsApp group admin. be an admin of any WhatsApp group.

Indian Mobile numbers have 10 digits with AB-XYZ-OOOOO format where AB- the access code, XYZ- MSC Code and OOOOO is the subscriber number. First five digits are allotted time to time by DoT to all mobile operators. Generally a set of 10 MSC codes are allotted to a mobile operator hence first four digits of the mobile number become sufficient to identify the mobile operator and circle.Now we have to spoof our number with the Target Mobile Number. Note down the simple code Coversion if you know the Binary conversion it will be easy 
0 —- 0 0 0 0
1 —- 0 0 0 1
2 —- 0 0 1 0
3 —- 0 0 1 1
4 —- 0 1 0 0
5 —- 0 1 0 1
6 —- 0 1 1 0
7 —- 0 1 1 1
8 —- 1 0 0 0
9 —- 1 0 0 1

Eg: 919999999999 = 1 0 0 10 0 0 11 0 0 11 0 0 11 0 0 11 0 0 11 0 0 11 0 0 11 0 0 11 0 0 11 0 0 11 0 0 1
NOW FOR HACK WHATSAPP GROUP ADMIN Send this message to group
“cng=true?=[target mobile number in binary]![your mobile number]&findchache.mnc.id= [802]ste5%Set.content?/ rfd=gv

after this Uninstall WhatsApp from Your phone And Reinstall it. For android phones clean the cache using clean master.
You will be the admin of the new group
NOTE–: I HAVE TRIED THIS ON WHATSAPP 2.11.12V I DONT KNOW ABOUT OTHER WHATSAPP
Read More

Monday 14 March 2016

Lock a Folder With Password Using Free Folder Protector

Leave a Comment
All of us have some files and folders that we consider private. They can be anything from our business documents to pictures of friends and family. These are files that we don't want other people using our computer to know about. As Windows offers no way to protect our private information, most of us get in awkward situations when these files are discovered by unwanted people.

Surely, you can store this information in a hidden folder. The only problem is that anyone can easily search the contents of a hidden folder using Windows Search itself.

The only viable solution is storing this content in a password protected folder so that only those people knowing the password of the folder can access it. There are many folder locking programs available online but the problem is that most of the good ones are paid. Even if you do manage to get a good free one, you will be looked at suspiciously when people see a folder locker in the list of your installed programs.


If you too find yourself in a similar situation, you can try Folder Protector, a password protector for Windows folders that is not only free but is also portable meaning that it does not need to be installed. Just click on the exe file and the program will start running. I have created this program based on suggestions and feature requests that I have received by email over the last two years.


Folder Protector:

Folder Protector offers each user a protected folder that can only be opened by entering the password in FolderProtector. Unlike most security programs, Folder Protector is small in size (nearly 58KB) and does not show the folder that it is protecting. This gives an additional advantage that people who don't know the password do not have a target to try and hack their way into. As the software is portable, you can hide it or even delete it after protecting your folder and no one will have a clue what it was used. Then whenever you need to access protected files, you can re-download the program from this page, enter the password and access your protected files.

Download Folder Protector


Download for Windows XP

Important: 1) This program uses a simple method to lock files and should not be used to protect truly sensitive information. It is best to encrypt that kind of information.

2) Do not refresh your Windows when your folder is locked. Doing that will delete your files.


How to use Folder Protector?


When you run Folder Protector for the first time, the program will ask you for a password that you want to use. Enter a password that you can remember as this will be the password to your protected folder.

Lock Folder With Password

After entering the password, the program will open a folder named SecuredFILES. This is your protected folder. You can add all your private files in this folder. This folder is located at the Desktop. After adding all your files, you may close this folder. 

Then, you can use the menu in the program to lock your folder. To lock the folder, type lock as your action. After successfully locking the folder, FolderProtector will display that the folder is locked.

Free Folder Lock

Unlocking the protected folder is easy. Just type unlock as your action. Then the program will ask you to enter your password. Upon successfully entering the password, the program will display the contents of your protected folder.

Changing the Password: Just type change as your action. The program will ask you for your current password. Upon successful entry of the current password, the program will ask for your new password and change it instantly.

Acknowledgment: This software has been made possible only through the suggestions of readers of this blog, especially Ernell Albert Galido for his idea of using a menu-based interface.

Windows Compatibility: This program has been successfully tested on Windows 8.1, Windows 8, Windows 7, Windows Vista and Windows XP.

Support and Development

I will continue to develop this software further. So, your suggestions are invited. If you face any problem while using this software, you can use our support page.
Read More

Tuesday 8 March 2016

How to crack laptop/pc password easily

Leave a Comment

Method 1:


if your friend or someone put the password to their computer or laptop and they did not want anybody to have access to it, then you will be able to unlock the password and gain access to its system menu

first, take the laptop you want to open its password,

then restart it and press F5,

then select "Safe Mode"

And Select"Administrator" then go to "User A/C" and click

Remove PassWord.

you are done. the system will open immediately.


Read More

Sunday 6 March 2016

Top 20 Android Apps Used By Hackers For Hacking

Leave a Comment


Hacking apps


Here are the top best 20 android hacking apps 2016 that hackers used for pen testing, hacking, wifi hacking, Facebook, WhatsApp testing and security attacking from android, Download the apps given in the article.
Note:- This article is for knowledge and the apps shouldn’t be used for illegal activities, I am not responsible for anything happen to you.

1. AndroRAT :

AndroRAT


AndroRAT is used for android devices for remote administration. Basically, the Remote Administration tool is a client-server application that helps in controlling the system without having access to the physical part of the system.

2. SpoofApp:


SpoofApp helps in spoofing calls with any caller ID number. You will receive a free5 minute Spoofcard if you are installing it the first time. With the help of SpoofCards which are sold separately, we can SpoofCall. Many other features are included as Voice changers that can change your voice. It also has the feature that you can record the whole conversation. This app is very useful and works on all Android devices. It is also a safe and virus free app.


3. Whatsapp Sniffer:


Whatsapp Sniffer Basically is a great famous android hacking app. With the use of this app, You can hack Whatsapp chats, pictures, videos, audios of your friends who are using your wi-fi hotspot. While using this tool, disable your antivirus as the antivirus can detect this app.

4. APK Inspector:


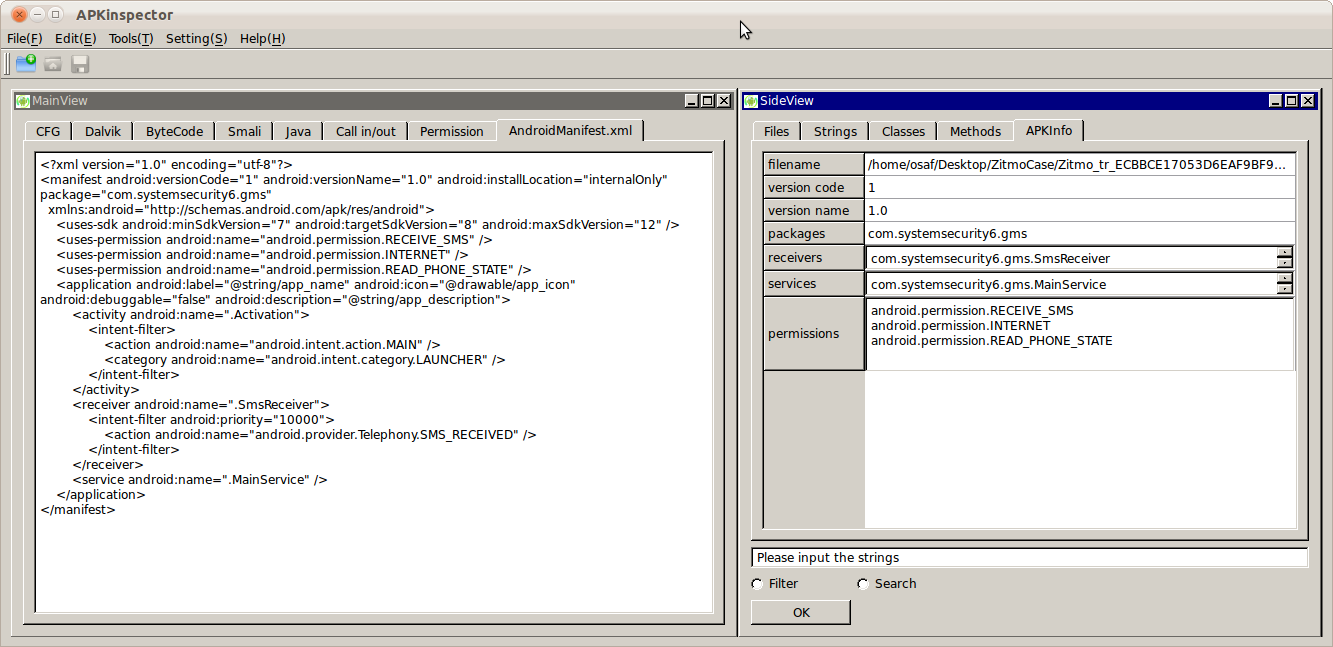
APK Inspector is used for Reverse Engineering. It is a successful GUI tool to analyze the android applications. With this, you can easily fetch the source code of any android application. This app helps to visualize compiled Android packages and corresponding DEX codes to remove licenses and credits.

5. Wi-Fi Kill:


With this app, You can disable the connection of a person who is using the Wi-Fi network. You can disable any device connected in the same Wi-Fi in which you are connected too. While using this app, make sure your phone is rooted and you can easily kick another user from Wi-Fi.

6. DroidSheep:


Droidsheep allows the same process as done in Facebook hacking you get lots of questions. It allows us to catch social accounts by hijacking sessions on the android devices present in your network. Hijacking sessions requires knowledge about how session hijacking works read on W-fi. This app is mainly used for security analysis. It can detect Arp-Spoofing on the network, Faceniff and other software.

7. Eviloperator


This app automatically connects two people in a phone call making them feel that they called each other. A good thing is you can record and save the conversation.

8.Zanti:


Zanti is the best hacking app for android devices. It covers almost all security tools related to hacking any Wi-Fi networks. This is one of the best and favorite tool for the hacking of android devices present in your network.

9.Shark for Root:


This app is mainly for a traffic sniffer for android devices. Through the use of this app, you can sniff any network and can collect lots of data and information from any Wi-Fi network. It runs on 3G and Wi-Fi and also in Froyo tethered mode.
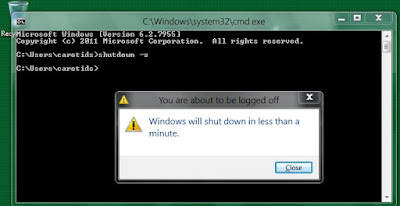
10. android:


android is a tool designed for security Professionals for performing Denial of Service attack. Denial of Service attack is carried out on websites or web serves using android devices.
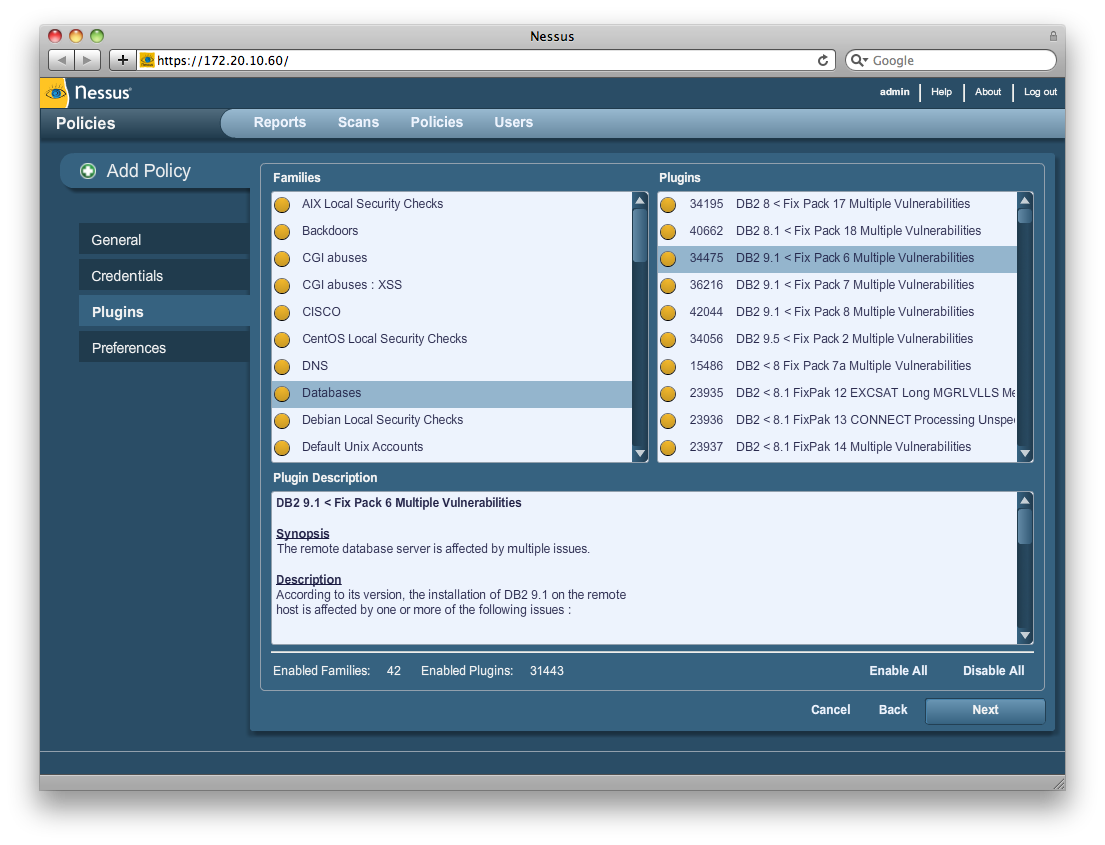
11.NESSUS:


Nessus considered the world’s most famous vulnerability scanner, used by over 75,000 organizations worldwide. Nessus is an inclusive vulnerability software used basically for scanning. Its main goal is to note potential vulnerabilities on the tested systems such as few common passwords, default passwords on some system accounts or misconfiguration or denial of service attack against the TCP/IP stack by the use of crushed packets.

12. FaceSniff :


facesniif is a hacking app particularly used to sniff Facebook Id over the same Wi-Fi network. It also helps you to catch the email address and password connected to the same Wi-Fi network. It too has many features: Blogger, Twitter, Tumblr, and many more online accounts. This app comes with a paid version but also there are many cracked versions on the internet.

13. AppUse


AppUse stands for Android Pentesting Platform Unified Standalone Environment. This virtual machine was developed by Appsec Labs. It is a unique and free platform-independent for mobile application security testing done on android devices.

14. NMAP for Android Nmap ( Network Mapper)


Nmap runs on all major types of the operating system especially console and graphical versions. Nmap is basically a free and open-source benefit for network research and security inspection. Its usefulness is also carried out by many systems and administrators for their tasks such as network monitory, managing service, upgrade schedules and many more. Its main purpose in designing is to scan large networks rapidly but works fine against single hosts.

15.Network Spoofer :


Network Spoofer is an android hacking app that allows you to change the website on another person’s computer from your Android Mobile. This app declares you how vulnerable the home network is.

16. Droidsqli:


This app is particularly used for hacking websites. Using this app, you can hack the website through the sqli attack method. It can also hack the admin username and password easily.

17. insider:


inside is an app that carries out hidden WiFi in your area. It also carries out a hidden SSID WiFi signal and also finds out a low range wifi signal present in your area. If Some smart wifi is living in your area then they set hidden SSID through which you can’t see wifi name normally on your phone.

18. Penetrate Pro


Penetrate Pro app is particularly used to hack passwords of Some routers. It calculates WPA/ WEP security keys for the routers.

19. Hackode


It’s a toolbox for hackers. Hackode is an application made for ethical hackers, IT administrators, Security analysis and cybersecurity professionals. It includes many features as DNS Dig, Google Dorks, Whois, Ping, etc.

20. WPScan


We all know that WordPress is one of the most famous CMS and is being run by millions of websites. So in that case, WPscan is the vulnerable scanner of WordPress for android devices.
Read More

Remove Write Protected From Pendrive and Memory Card

Leave a Comment


Remove Write Protected From Pendrive and Memory Card

Sometimes we want to format a pen drive and memory card but we aren't able to do it. When we try to format the pen drive and memory card then we get a pop-up window saying the device is write-protected. Now, I have a solution to remove the write-protected and format the pen drive and memory card.

Howto?

1.  Firstly, click on the start.

2. Then click on run.

3. Then type Regedit and then press enter. Now the computer will ask to allow to run the program click on yes.

4. Now, this process will open a registry editor.


5. Now go to  


 HKEY_LOCAL_MACHINE\SYSTEM\CurrentControlSet\Control\StorageDevicePolicies


6.  Now right click on write-protect and then click on modify. 


7.  Now change the value data to  0. And then click on ok.


Note:- If you can't find the StorageDevicePolicies, after the control folder then you have to create this folder. For creating it, steps are given below,

          1. Select CONTROL folder in the left navigation pane.

Read More

REMOVE WRITE PROTECTION IN PENDRIVE AND MEMORY CARD

Leave a Comment


Don’t you just hate it when you buy a Pendrive or a Memory card and there’s nothing you can do to it? Whether it comes with software on it, or you’re just trying to use it for any other purpose, you should have the right to change things up however you like.
In this guide, you will be shown how to Remove Remove write protection in Pendrive and Memory Card. It’s a fairly simple process, so be sure to follow each and every step carefully. This guide is for information purposes and we are not responsible for anything that may happen to your device in the process.
Before we proceed, what is Write protection exactly? Write Protection is when the manufacturer locks the device down from being written on and prevents unauthorized access to add, change or delete the files on the device. While the uses of write protection are a good thing because it prevents files from being tampered with and the manufacturer can make sure all users are getting the same files, but it’s also very inconvenient. To remove this protection, you will need to format the drive.
In this guide, I will show you exactly how to do that. Follow each and every step carefully, please. Windows platform is used for the purpose of this guide.


HOW TO REMOVE REMOVE WRITE PROTECTION IN PENDRIVE?


Step 1: Plugin your pen drive into your USB 2.0 on your computer. To make sure the computer has read your pen drive, you can go down to your bottom left on Windows, you will notice a small USB drive icon. If you click that, it will say “Removable Disk.” This means that the pen drive has been read successfully.  You can take a backup of your files from the pen drive or Memory card Because we here are going to format it Completely.


Step 2: Next we need to open up the command prompt. You can do this by simply going to “Start”, then just search for “Command Prompt”, or you can simply just type in “cmd” and a command prompt should pop up.
Step 3: In the command prompt, type in the drive letter of your pen drive with a colon at the end, like this: “ F: ” but without the quotation marks.
Step 4: After putting in the previous command, type in “format” without the quotation marks. Here’s how to do it: “format F:” and then press “Enter.”
This should get the process started to Remove write protection in Pendrive. Make sure that you are entering the right command with the right drive letter. If you have more than one pen drive plugged in, make sure that you do select the right one as you can accidentally format the wrong drive, causing loss of data.
Step 5: After the process is complete, proceed to the close command prompt.
Read More